overview
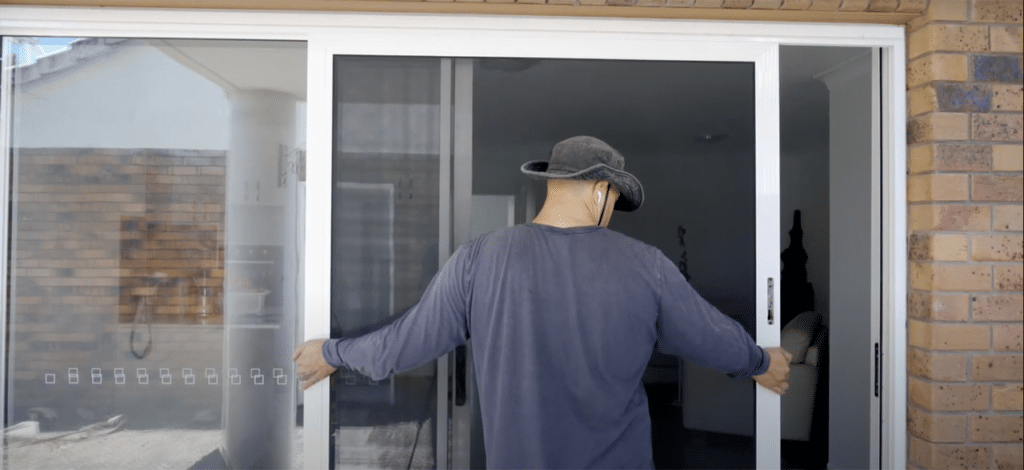
In this video we are going to teach you how to measure and install a SecureView security screen to a Comalco O X sliding door with Custom Tracks.
step 1 – check the accessories
Before starting with the measurements, check the accessories you will need for this installation. For this one, we need a Comalco Receiver Channel, a Top Track, a Flat Interlock, a F-Interlock and a Bug Strip.

step 2 – measure the width
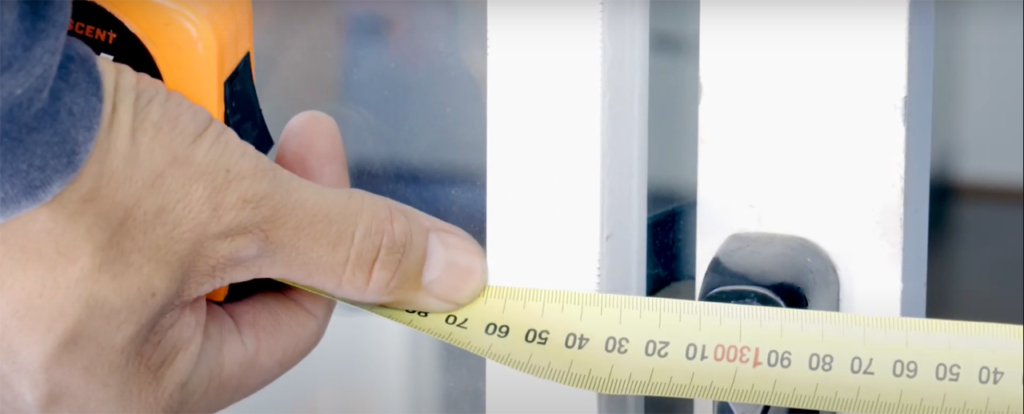
We start by measuring the width from the inside the jamb channel to the back edge of the centre mullion. This measurement is 1365mm.
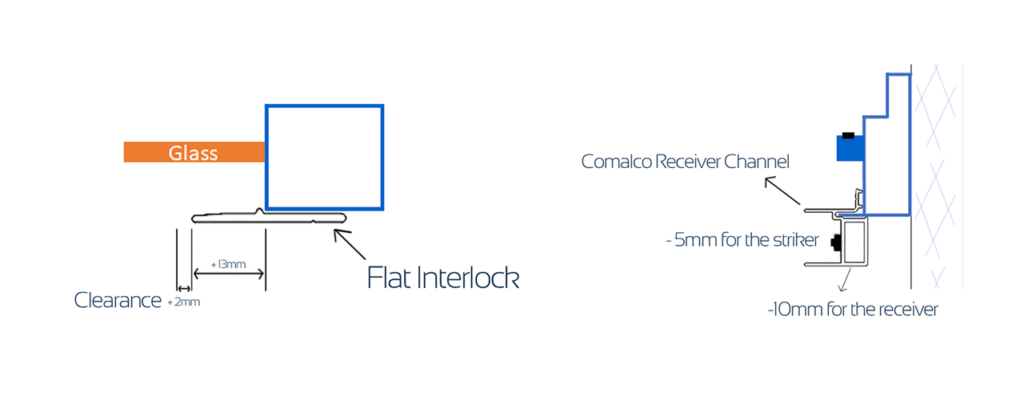
step 3 – Find Comalco Receiver Channel size
A clever person designed the Comalco receiver channel so that when combined with a standard flat interlock no deductions or additions are needed.
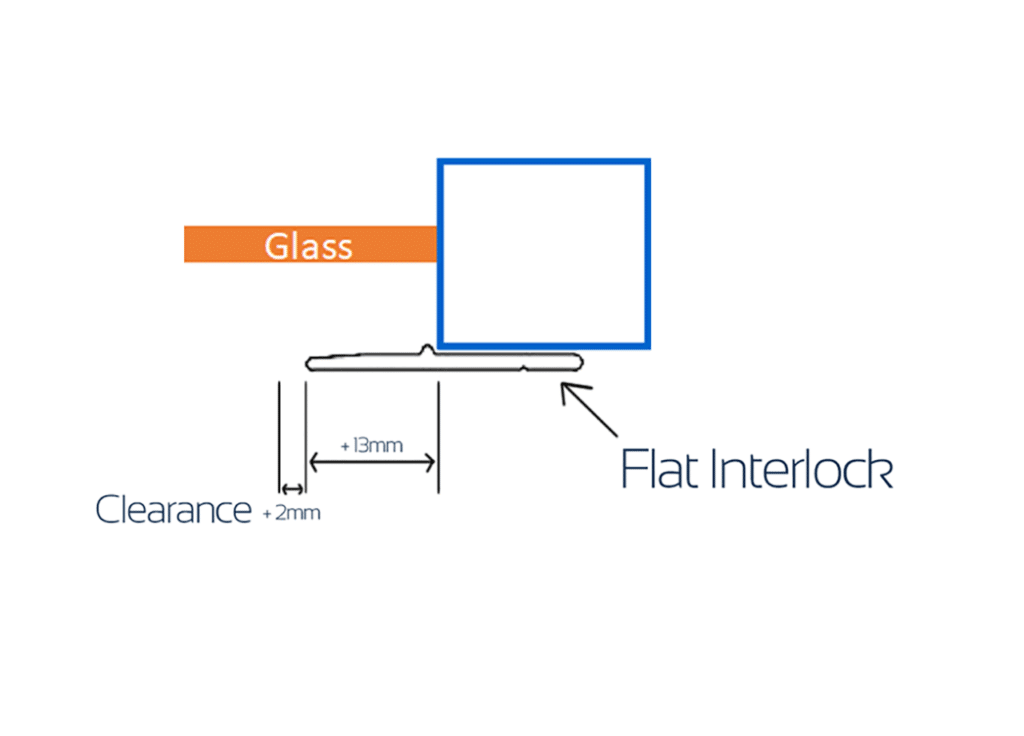
TIP: A flat interlock adds 15mm while this receiver deducts 15mm resulting in the measured size being the manufactured size.
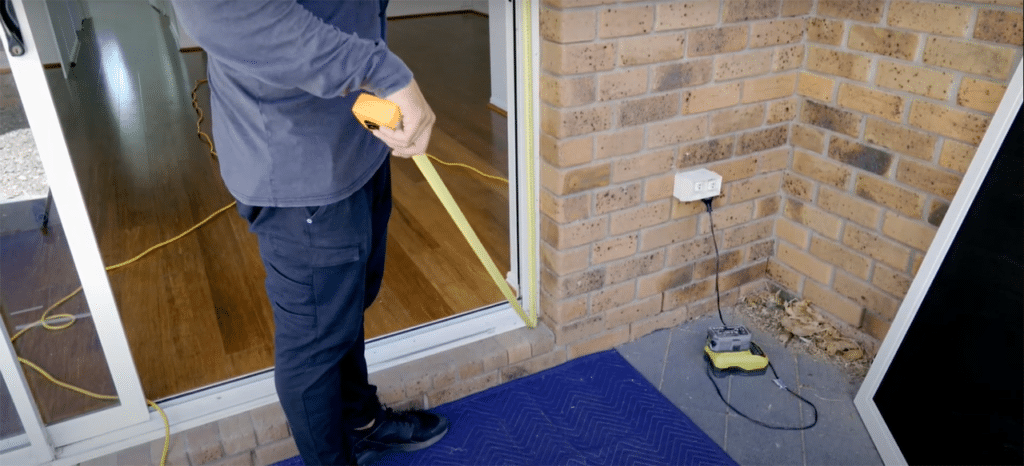
step 4 – Measure the height
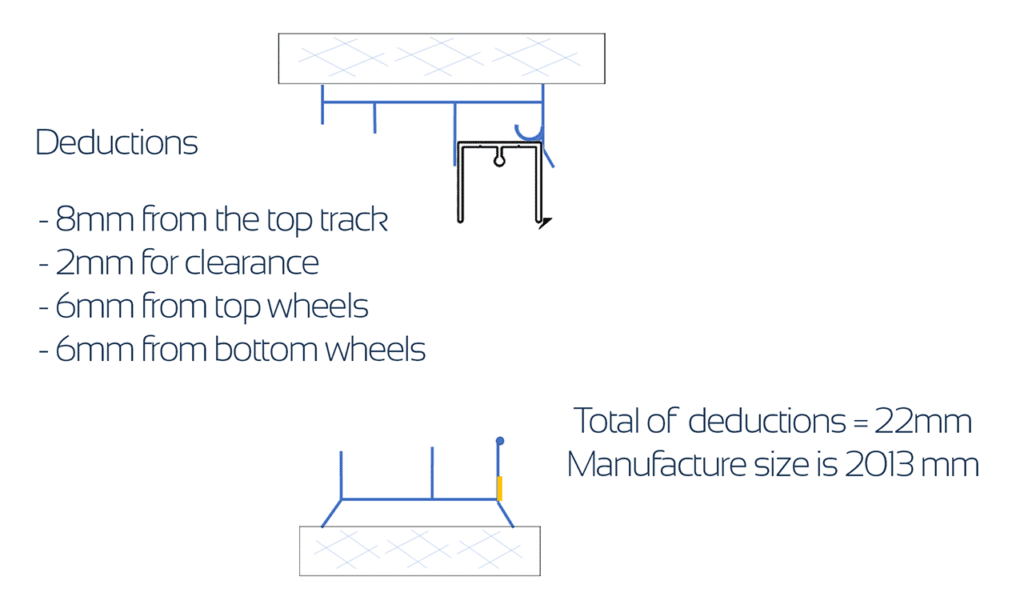
Measure the height from inside of the top track, placing the measuring tape from the bottom edge of the existing top-hung roller to the bottom pip track. Measurement is 2035mm.

For this installation, we will deduct 22m for the manufactured size of 2013mm.
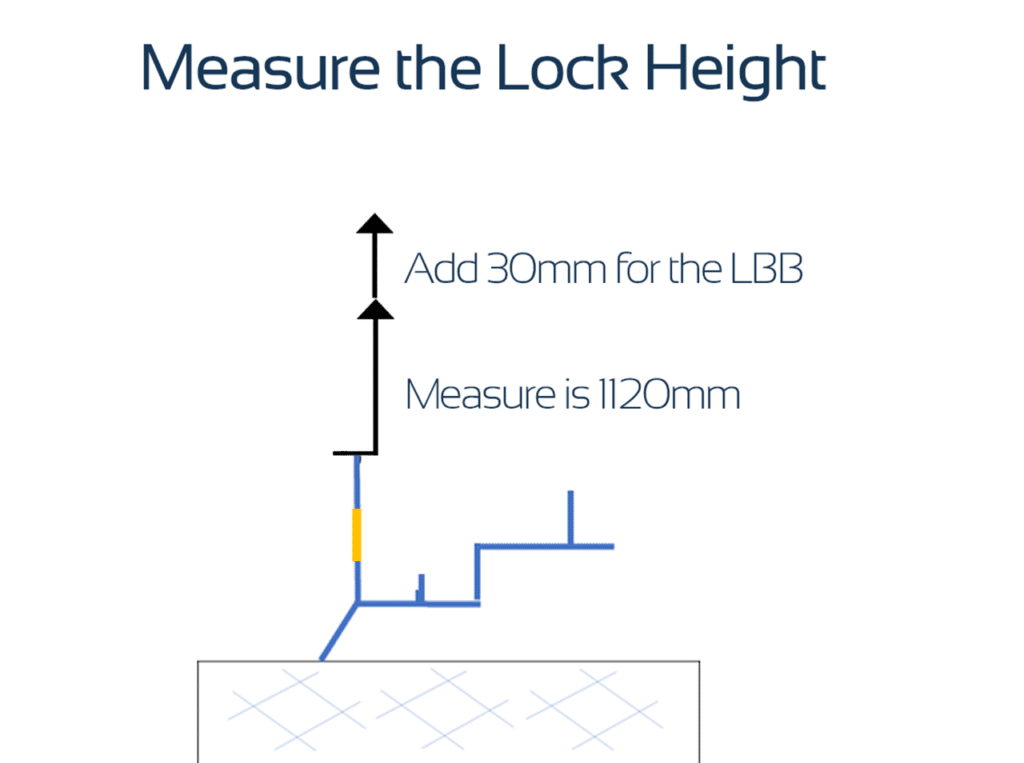
step 5 – Measure the lock height
Measure the lock height, from the bottom pip track to the top of the existing lock for your Lock Box Bottom. The measurement is 1120 mm, for the security screen, add 30 mm for a manufacturing size of 1150 mm.
step 6 – Measuring the receiver jamb
Measure the receiver from the top hung track to the bottom edge of the track. Measurement is 2053mm.
Step 7 – Fix off the track
Cut to size and fix off the track to the jamb with pan head screws.
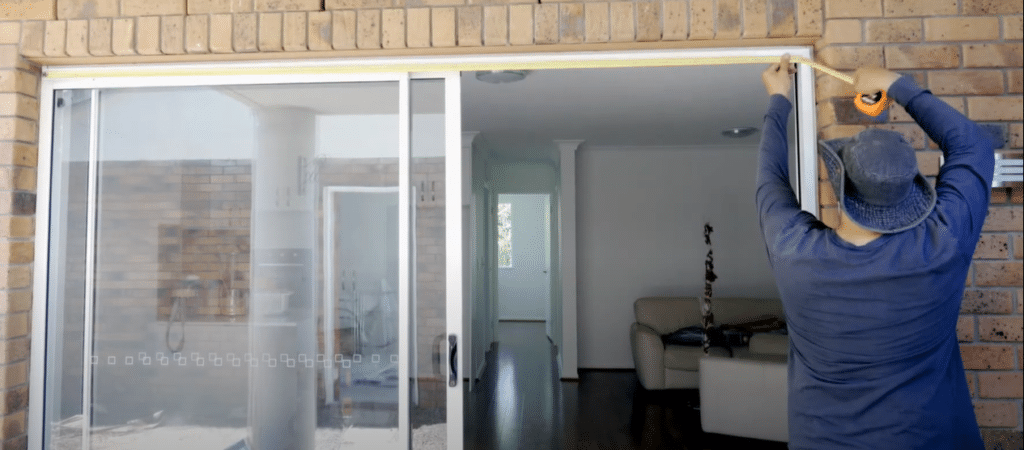
step 8 – Measure the top sliding door track
Measure the top sliding door track measuring from the added receiver jamb fin to the back edge of the track. Measurement is 2638 mm.
step 9 – Cut to size and install
Cut to size and Install snapping into position and fix off with small self-tapping screws.

step 10 – Install the door
First, attach the top guides, then lift the door into position. Adjust the wheels for squareness.
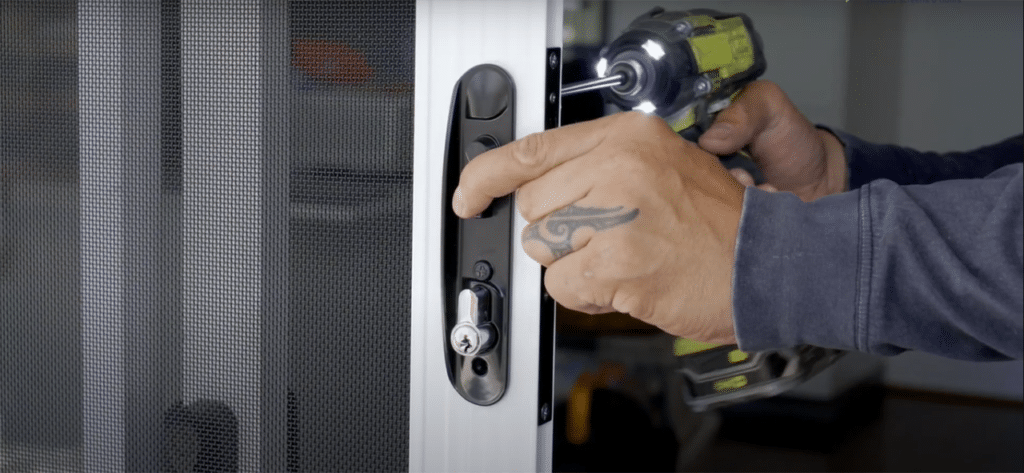
step 11 – Install the lock
Install the lock and faceplates then insert the strikers, engage the lock to peel the tape and close the door. Unlock the door to reveal the strikers and fix with screws.
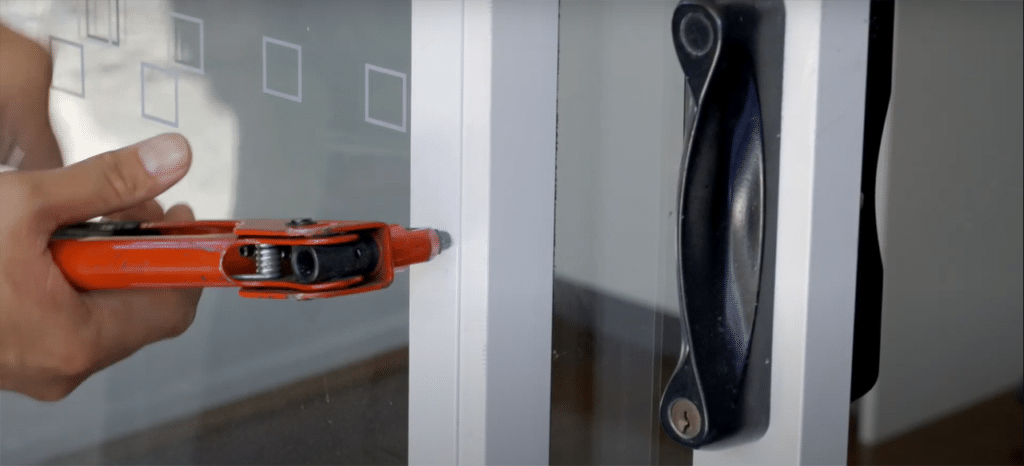
step 12 – measure and install the flat interlock
To measure the flat interlock position, close the security door and mark the back edge with Niko on the glass. Remove the door to measure the interlocks. Measurement is 2015 mm. Cut the flat interlock to size and fix off to the glass door with pop rivets.
step 13 – measure and install the F Interlock
Reinsert the security door and measure the F interlock. The measure is 1930mm. Cut to size and fix off with security screws.

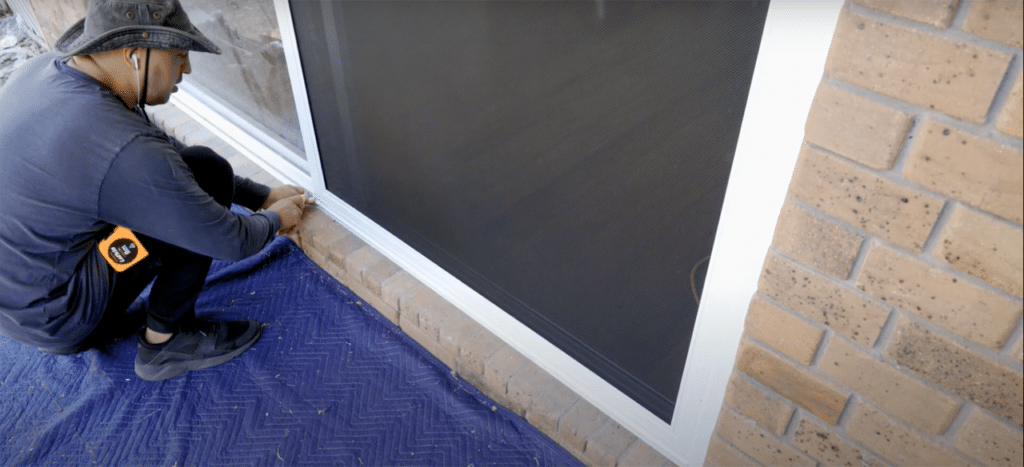
step 14 – measure and cut the bug strip
Finish by measuring and cutting the bug strip with the door in a closed position. Add pile, crimp the ends and fix off with self-tapping screws.
Well done, another successful Starline Security installation.