overview
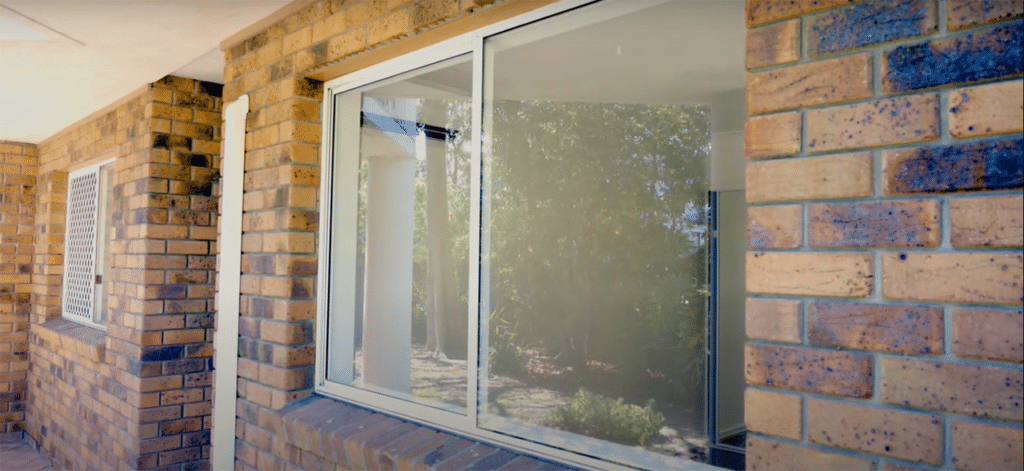
In this video we will show you how to measure and install a “face fix” Secure view screen to a Comalco OX Window. For face fix installations, the measurement and the installation are completed from outside the house. Removing the glass panel is not necessary.
step 1 – Measure the width
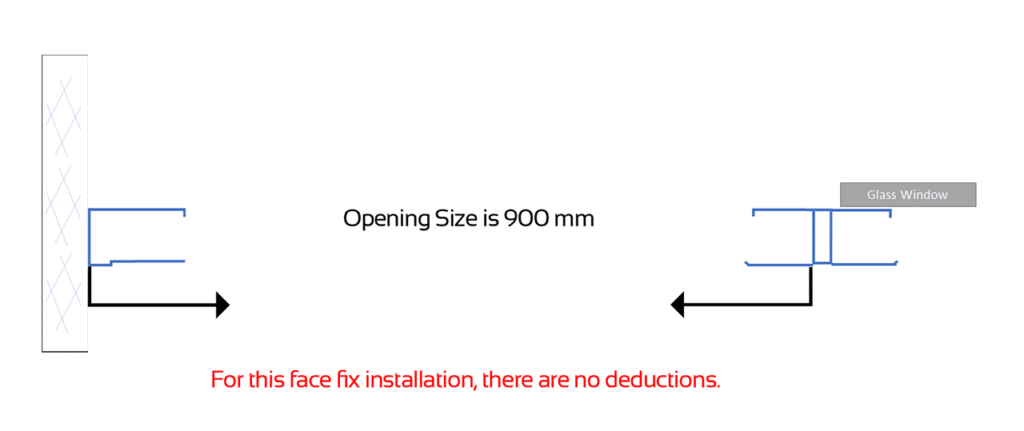
Measure the width from the left side of the window edge to the middle of the mullion. Essentially where you want the 11mm window screen frame to be installed. Face fix measuring accuracy is not as critical as drop-in, but the screen should align nicely with the window frame. In this situation, the measurement is 900mm.
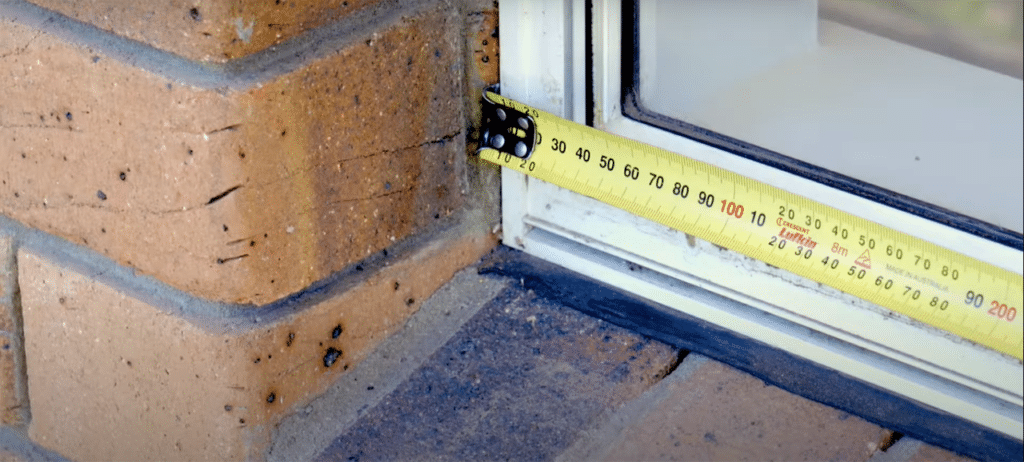
STPE 2 – Measure the drop
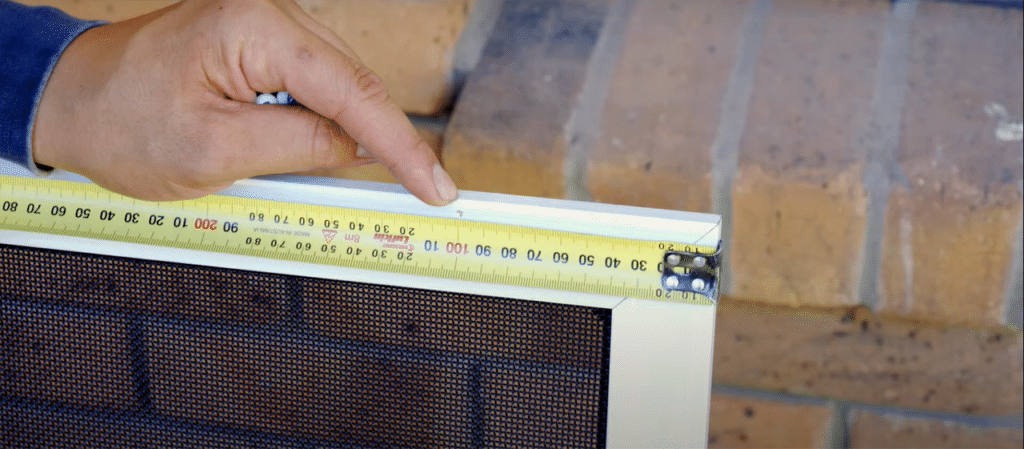
Measure drop from the top of the window frame to the top edge of the drain hole. This measurement is 1190mm.
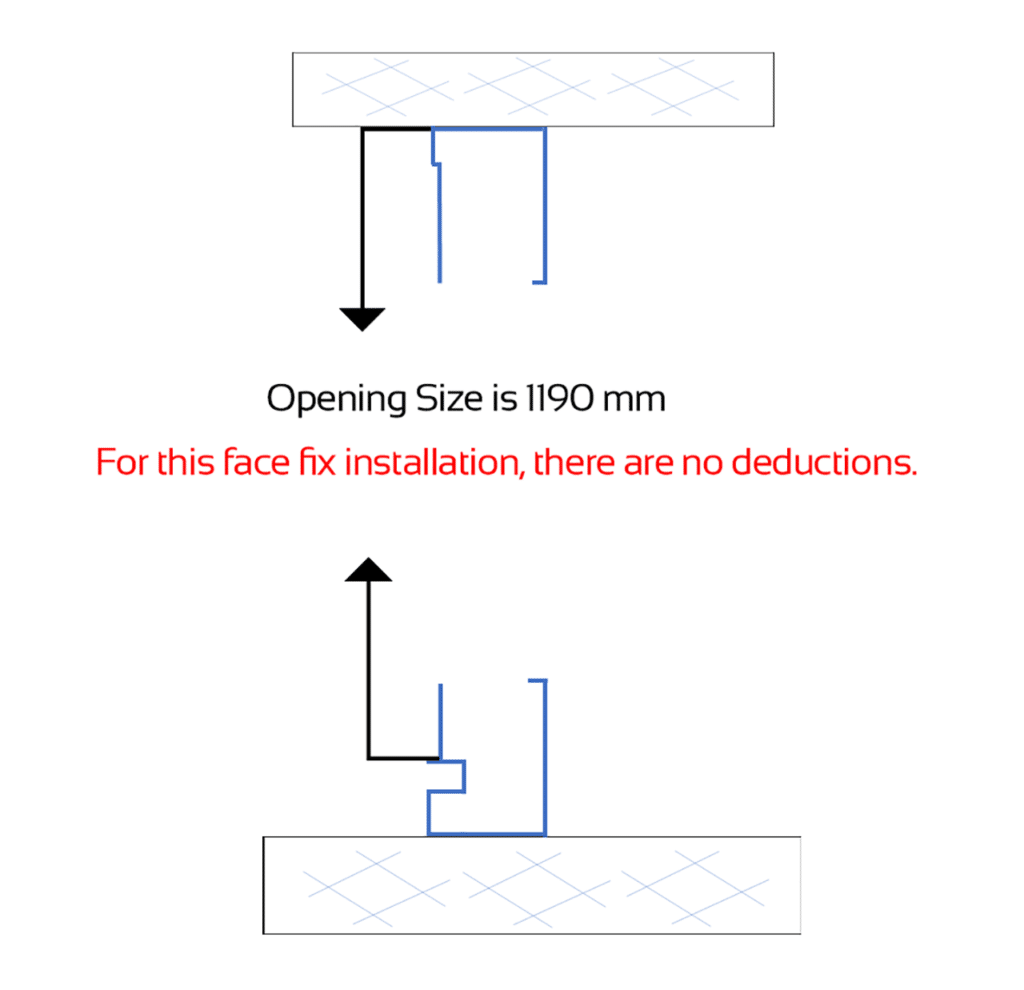
step 3 – Find manufacturing sizes
For this face fix installation, there are no deductions, the opening sizes are the manufacturing sizes.
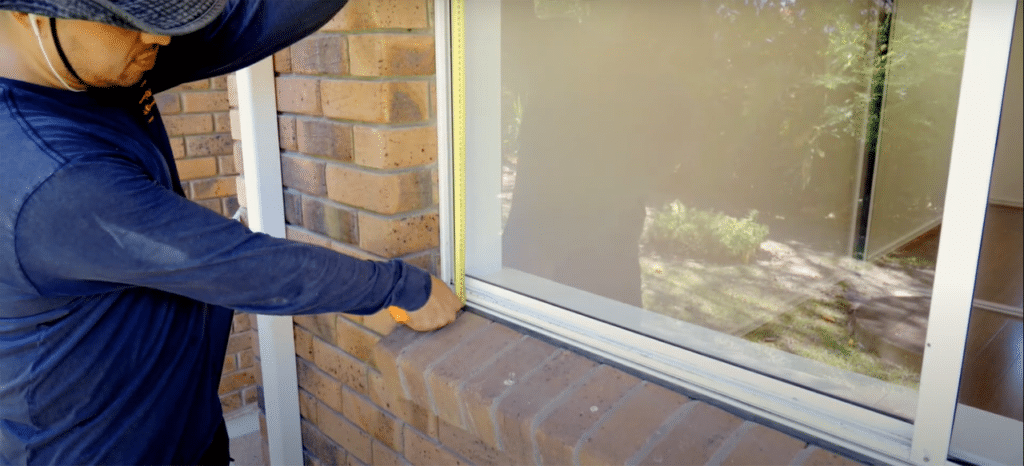
STEP 4 – mark the screens fixing points
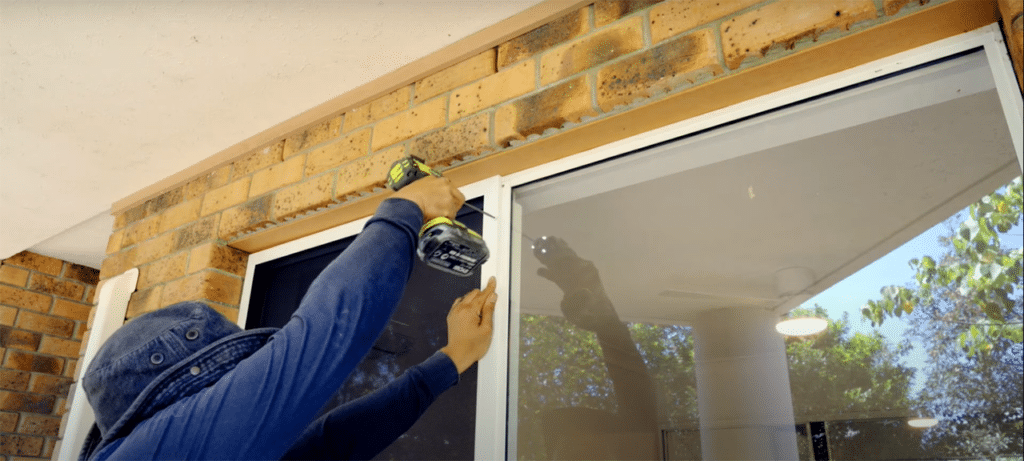
Use a pencil to mark the screens fixing points. Commence approximately 100mm in from each corner and space the fixing points evenly.
STEP 5 – fix the screws
Lift the screen into place positioning it hard up against the receiver side of the glass window frame. Check to see if the screw fixing positions are ideal. If all good, start by fixing the top and bottom screws to the mullion first. After fixing the screens corners, install one screw in the middle of each side. For this window, we are using 10 (ten) security screws in total.
step 6 – Finish the installation
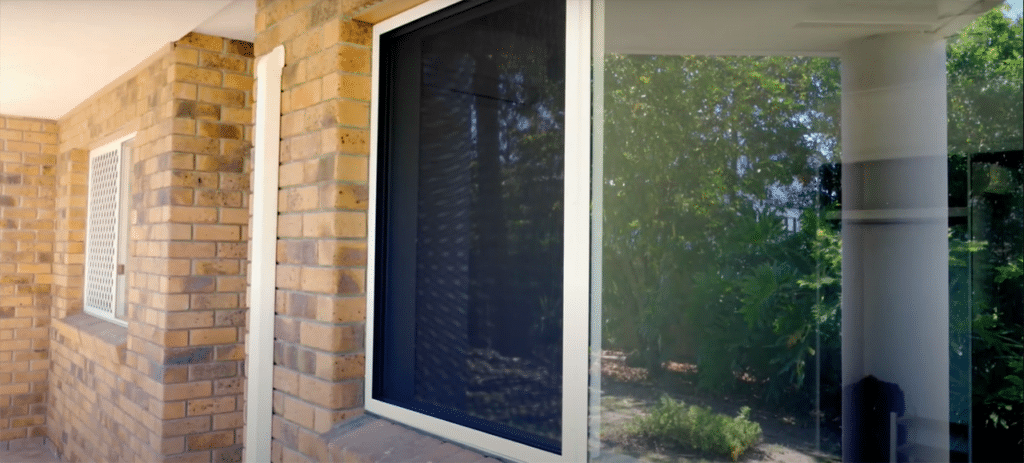
Finish the installation of the window by cleaning the area.
Contact us to know how to become a Starline Security Dealer.