overview
In this video we are going to teach you how to measure and Install a double sliding flyscreen to a casement window
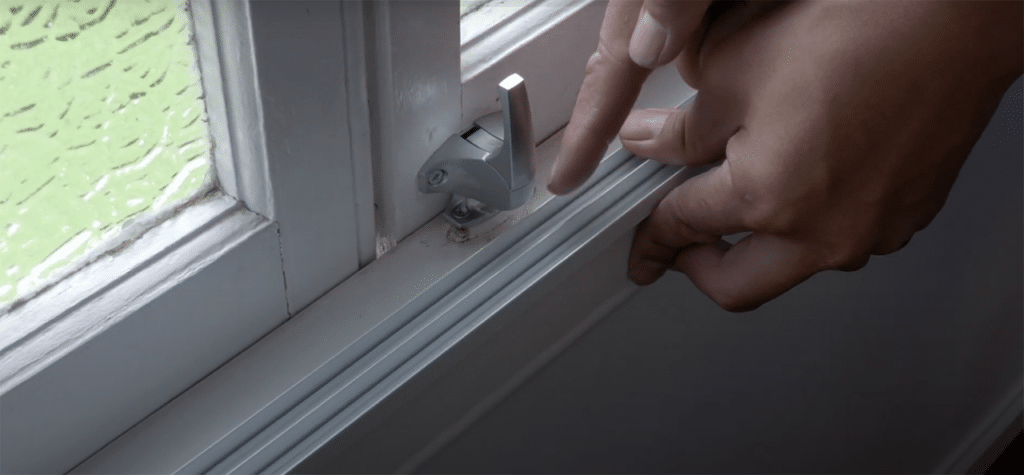
step 1 – check window handle
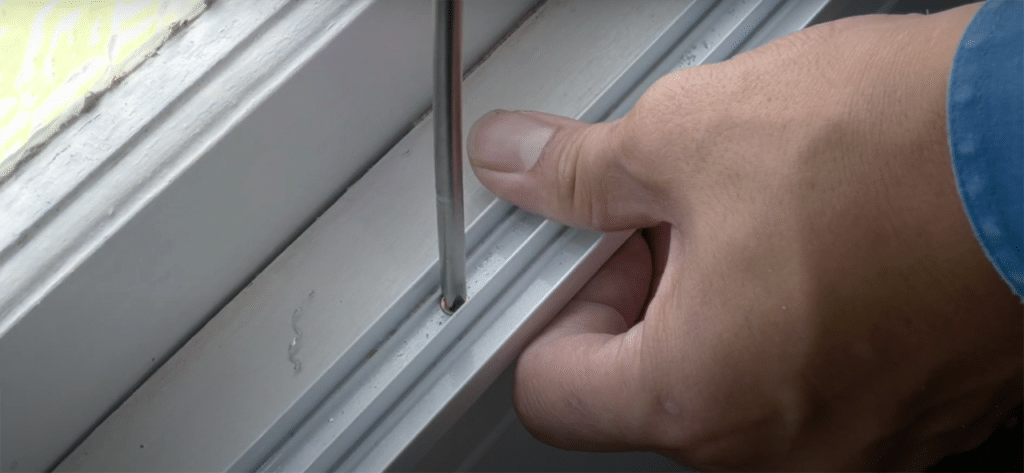
One factor is how much the casement window handles, catches or hardware sticks out compared to the sill or reveal depth. In this case, the window catch sticks out 32 mm and the sill or reveal depth is about 55mm. This gives us a maximum of 23mm to install our tracks. (drawing 1 of tracks showing where they are going relative to the catches and sill)
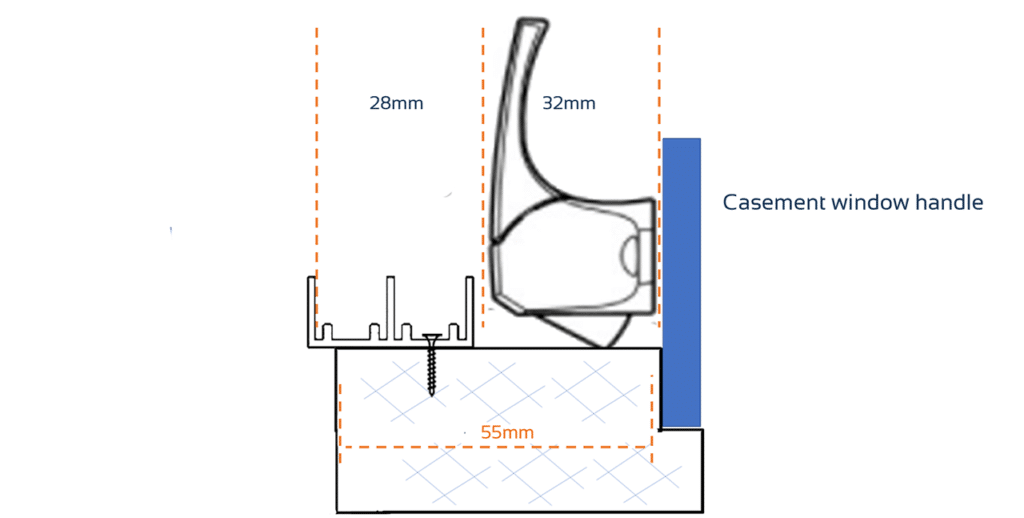
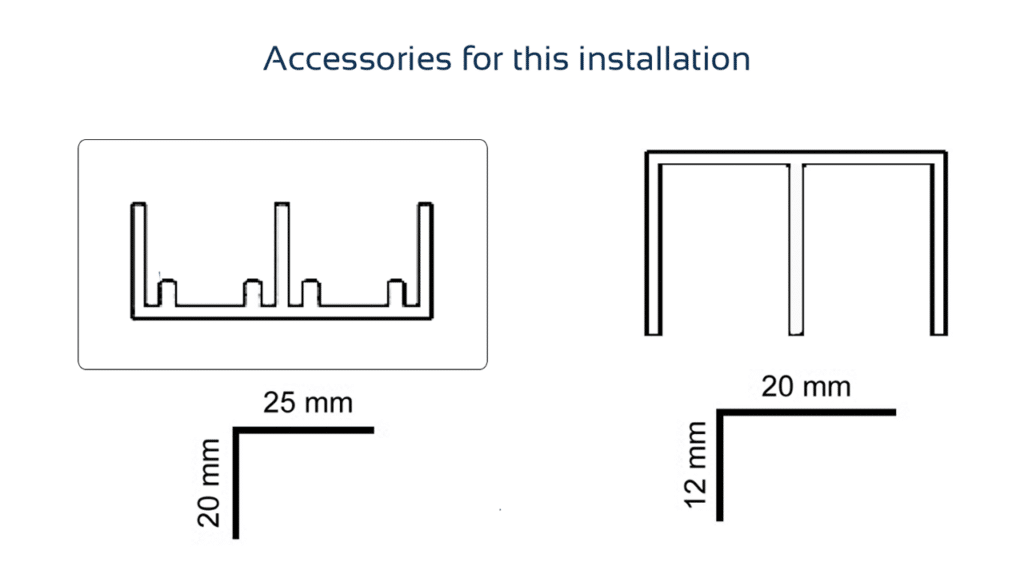
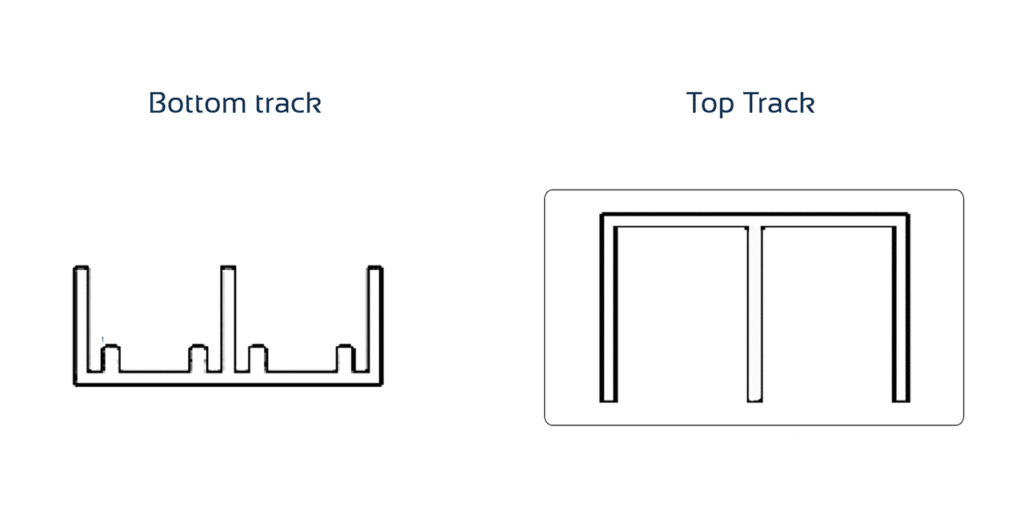
Note, this window screen setup uses a reveal-fit-double-bottom-track, a reveal-fit-double-top-track and side trim angles.
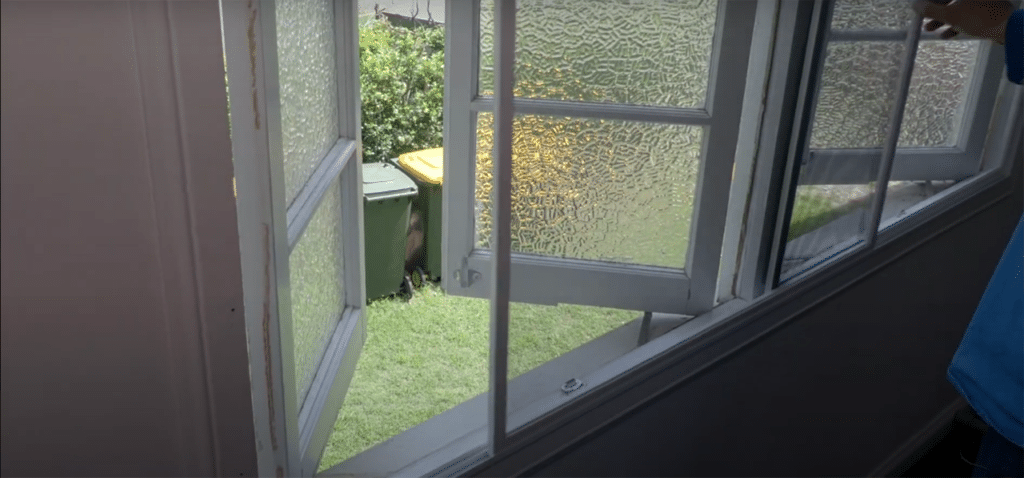
STEP 2 – measure opening size
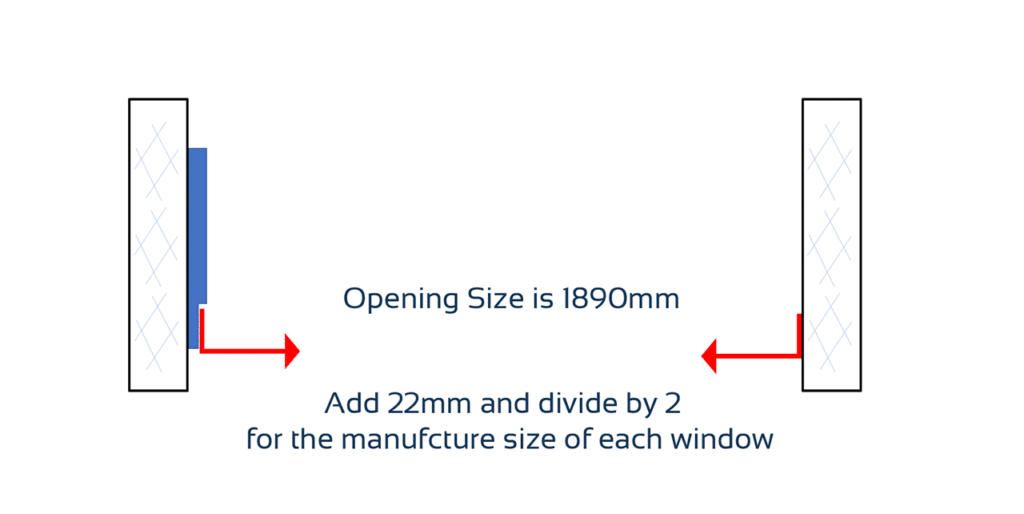
Measure the opening size widths from the edges of the window frame. Measure the top, middle, and bottom to see if there is any difference and use the smallest one. Measurement is 1890mm. If they are different by more than 10mm the side trim angles may need to be adjusted upwards in size. A 20mm projection side angles can accommodate most casement windows up to 10mm out-of-square.
We use the smallest measurement for our width calculations. As the screen frames will overlap in the middle, we add 22 mm to the width opening size and then divide that by 2. Manufactured size is 956mm for each window.
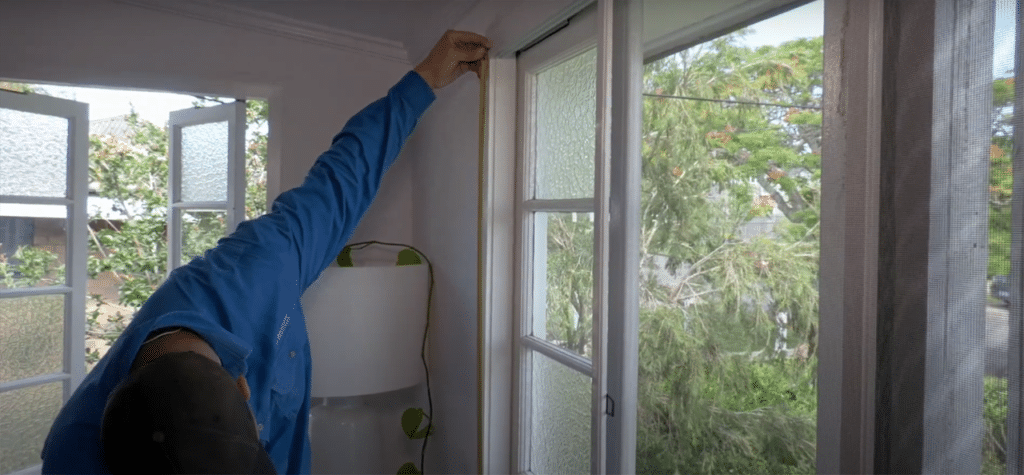
STEP 3 – check the drop difference
Measure from the sill to the top of the reveal measuring across at many points to see what the drop difference is and what the minimum and maximum opening height sizes are.
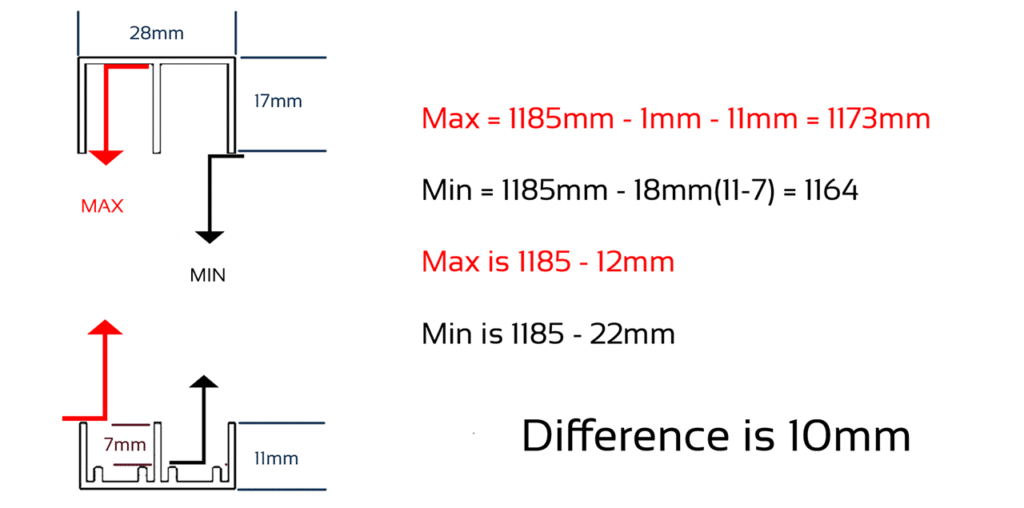
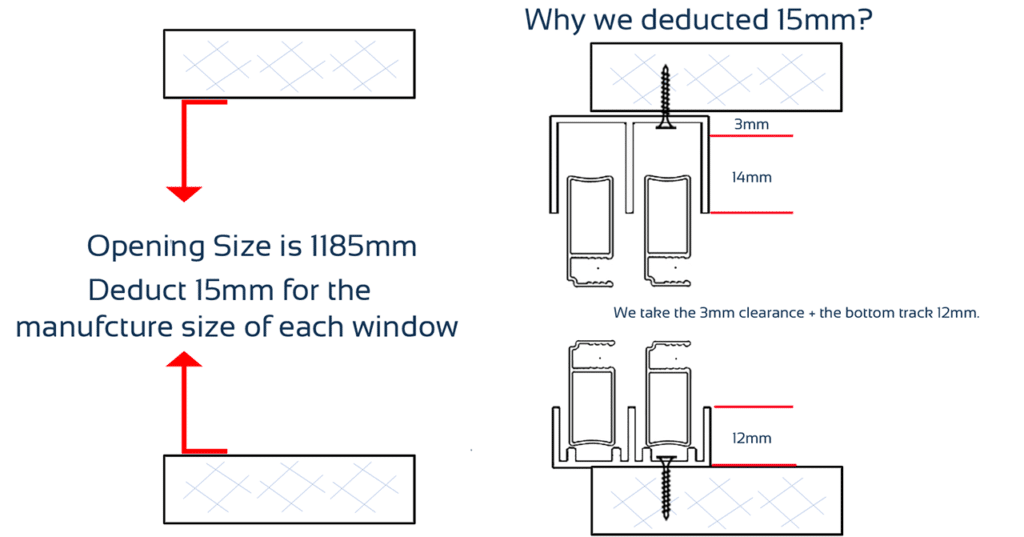
The measurement is 1185 mm. When the drop variance is less than 5mm deduct 15 mm to compensate the bottom and top channels for a manufacturing size of 1170mm.
STEP 4 – find deductions
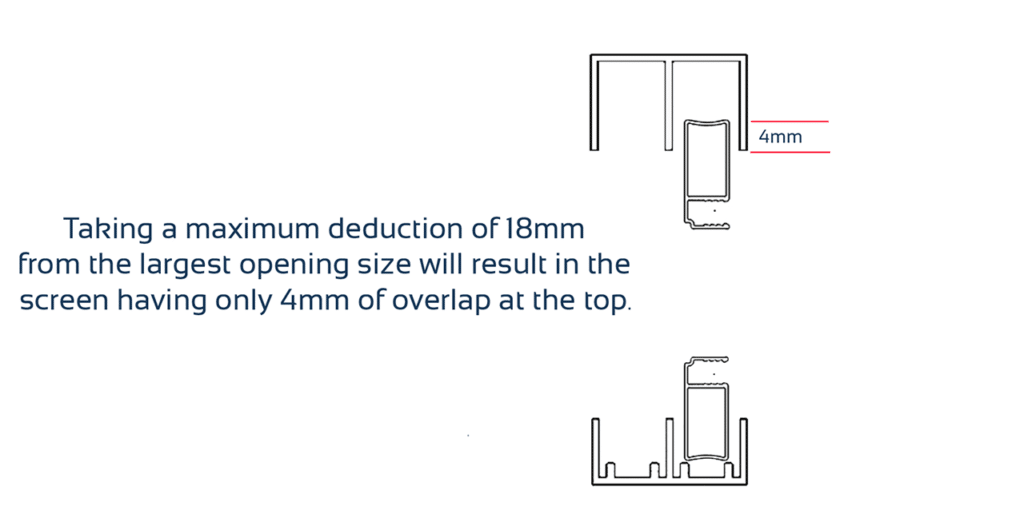
Taking a maximum deduction of 18mm from the largest opening size will result in the screen having only 4mm of overlap at the top.
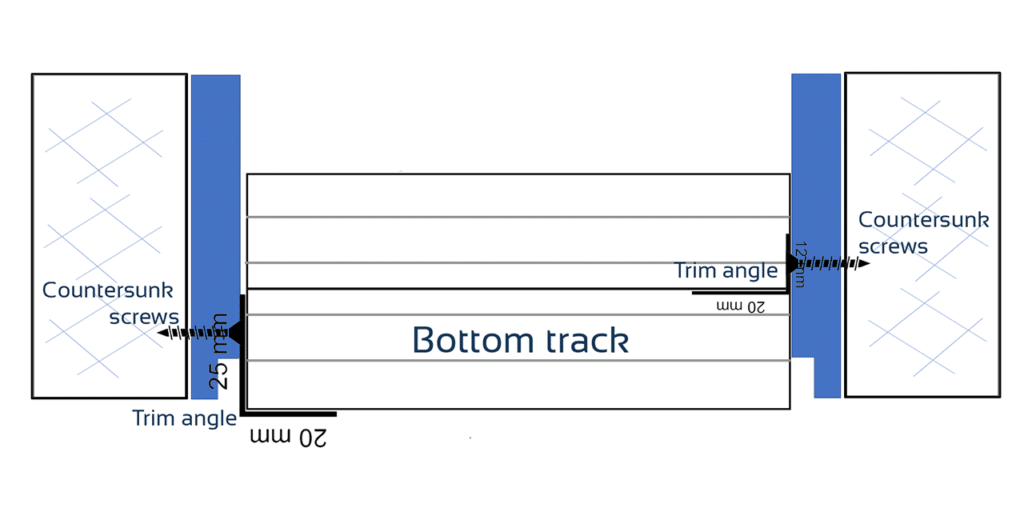
STEP 5 – Install the bottom and top tracks
Allow at least 1 mm clearance between the handle and any other window catches and the tracks. Screw each side in 100 mm and then every 3 to 400mm across the length. We recommend screwing the inside track.
step 6 – pre-drill
Slightly pre-drill and use 6-gauge countersunk screws so they fit in between the bottom channels screen runners. Use a similar process for the top track.
The top track is 10mm deeper than the bottom track. This feature allows the fly screen to have at least 8mm of overlap at the top while allowing easy fitment and removal of the screens.
step 7 – install the screens
To install the screens, lift them into the top track and swing them across dropping them into the bottom channel. Slide them across to the sides to test fitment and squareness.
Adding small canoe clips to the bottom of the screens helps them slide smoothly.
step 8 – Remove the screens to install the side trim angles
Measure the left side from the top of to the bottom of the track. The measure is 1190 mm. The angle needs to sit flush with the top and bottom tracks
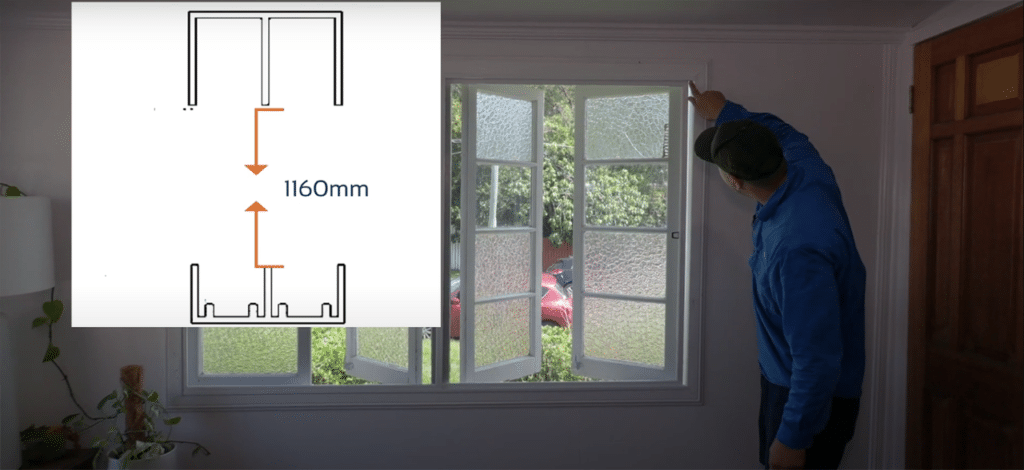
The right angle aligns with the centre track, rather than the outside point. Measure from the track lips. Measurement is 1160 mm
step 9 – Fix the angles
Fix the angles. We recommend screwing the side angles 15 to 25mm in from the ends and one in the centre.